Introduction
There are two methods of replacing media, the first applies to replacing the media of a single record, the second is to batch replace the media of multiple records. You can choose to replace the main viewing media or the thumbnail media or both.
Replacing thumbnail media can be handy for Sound records where the use of a ‘default’ thumbnail graphic makes it difficult to visually distinguish different Sound items. You may want to create your own thumbnail for each Sound record and apply the thumbnail with the replace media function.
Replace media (single record)
- Conduct a search that will retrieve the record to which you will replace it’s media.
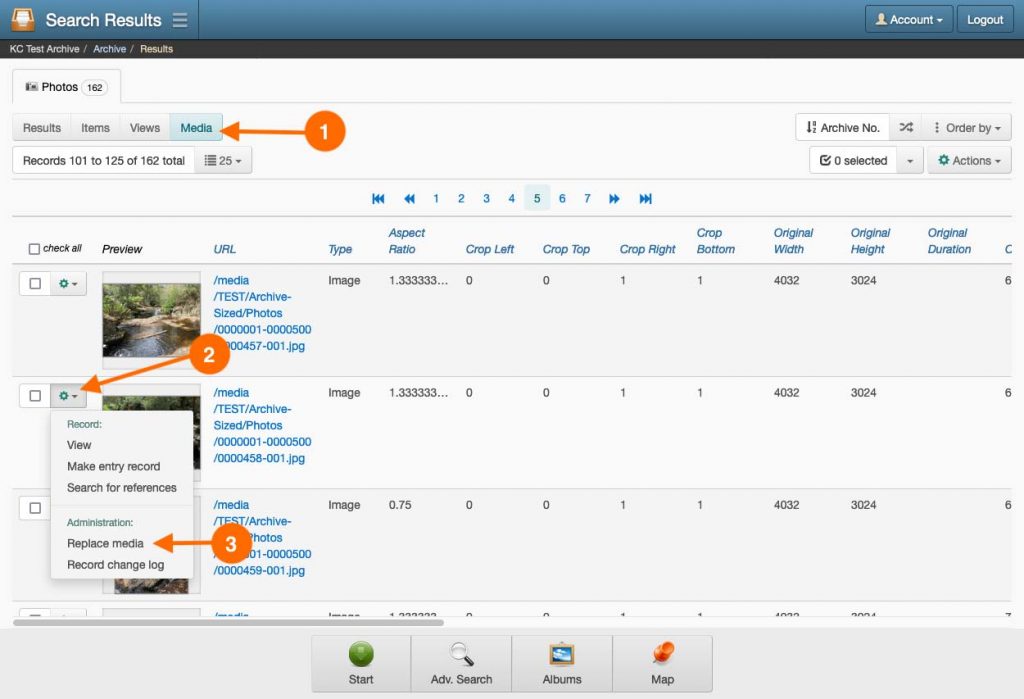
- Navigate to the Search Results page and select the Media button in the top-left of the page. The Media record should now be displayed in the search results.
- Select the ‘cog’ menu next to the media record that requires replacing and select Replace media.

- In the Replace media wizard, click Choose file.
- In the Choose file window, do one of the following:
- If the file has been uploaded to the archive’s FTP folder, select the Archive files tab, navigate to, and select the replacement media file. Click Select.
- Select the Upload files tab, choose your replacement media file or drag-and-drop it onto the browser window. Once it appears in the Files to upload list, click Upload.
- Select the Replace option for the media types you wish to replace.
- Click Continue to replace the media. Click Done once the process has finished.
- Refresh your browser cache to load the new media files into your browser. See Browser cache behaviour.
Batch replace media
Batch replace requires you to name the replacement media files with the archive view number. For example, if you were replacing the second page of a document with archive view number KC-0000294-002, you would name your TIFF image file KC-0000294-002.tif. The filename of the replacement media will then be paired to the corresponding media record during the batch process.
Your replacement files will need to be uploaded to the archive’s FTP folder prior to replacement or be ready to upload directly in the Batch replace media wizard. The archive’s FTP folder is the preferred method when dealing with a large quantity of files.
Lastly, you can only run a batch media replacement operation on the media records of one Archive Item class at a time.
To batch replace media
- You will need to conduct a search for the Archive Item class associated with the media you are replacing. You can do this by going to: Main Menu → Archive tab → either Photos, Documents, Movies, Sounds or Objects.
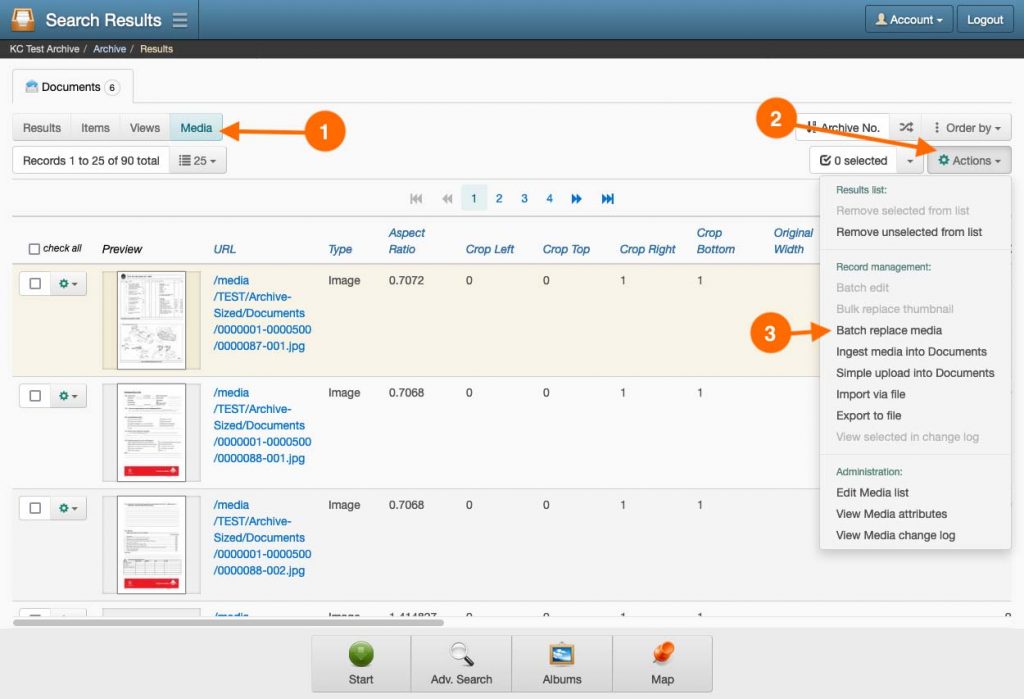
- Navigate to the Search Results page and select the Media button in the top-left of the page.
- In the Actions button menu, select Batch edit media.

- In the Batch replace media wizard, click Choose files.
- In the Choose files window, do one of the following:
- If the files have been uploaded to the archive’s FTP folder, select the Archive files tab, navigate to, and select all replacement media files. Click Select.
- Select the Upload files tab, choose your replacement media files or drag-and-drop them onto the browser window. Once the files appear in the Files to upload list, click Upload.
- Select the Replace option for the media types you wish to replace. Click Continue.
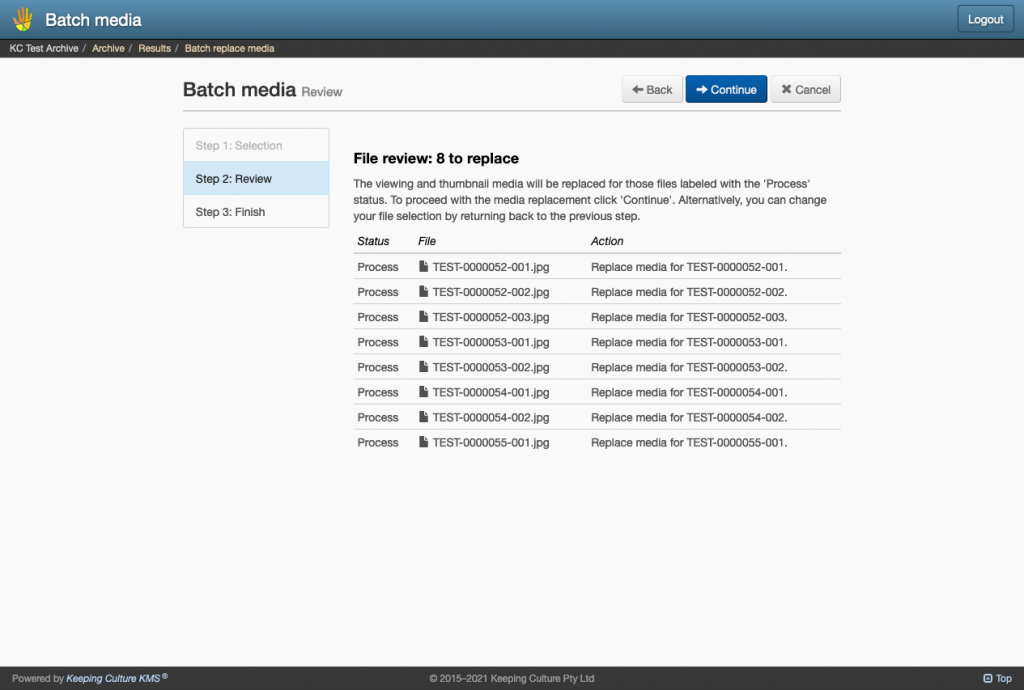
- In step two of the wizard, a table shows the Status, File and Action of your selected files. Rows with the ‘Process’ status will be replaced in the batch replacement process. A row with the ‘Skip’ status will not be processed. The Action column will provide a reason for not processing this file.

- Click Continue if you are happy to proceed with the replacement.
- The replacement will begin, and once complete, step three of the wizard will be displaying the outcome of the process. Click Done.
- Refresh your browser cache to load the new media files into your browser. See Browser cache behaviour.
