Introduction
Features play an important role in the archive. They help identify subject matter in Archive Items classes which in turn aids in locating records in a search.
The archive’s content restriction functionality will use Features to determine whether a Photo, Document, Movie or Object is accessible to a User. Commonly, the Sorrow restriction, when applied to a Person record, will block access to an Archive View records where the deceased person has been identified in with a Feature.
Whenever possible you should apply features; particularly for identifying people.
Applying features to Photos, Documents, Movies and Objects
- Display the record you want to apply a feature to in the View page.
- If you are applying a feature to a movie, you will need to position the playback head, using the player ‘seek’ controls, to the time where the subject matter is in frame.
- Select the General tab in the metadata column on the right-hand side of the page.
- In the Features control, click Add.
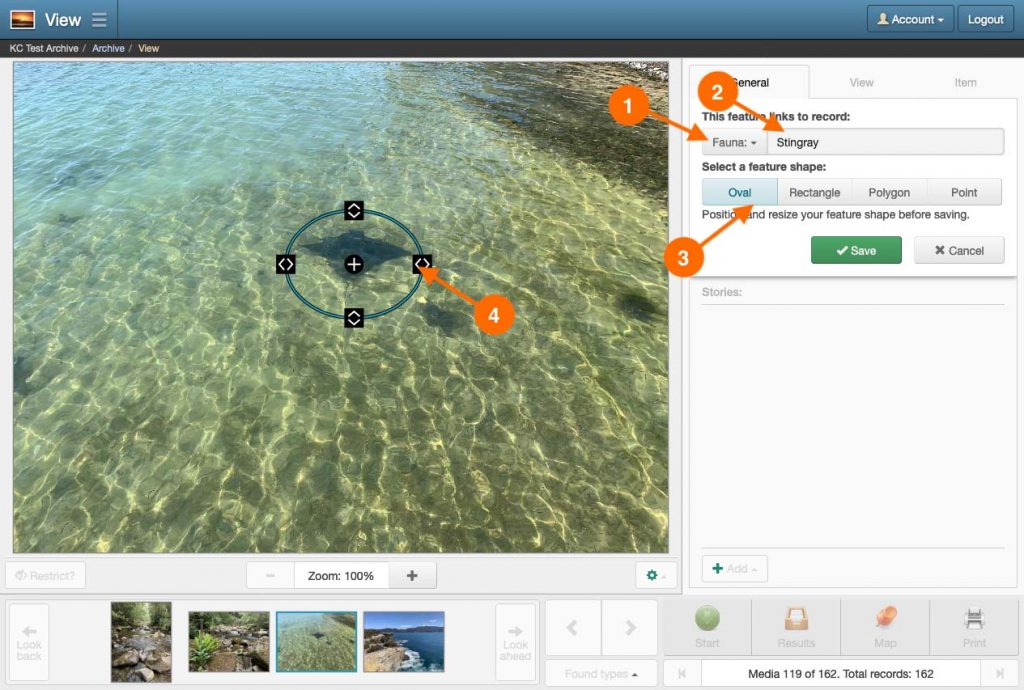
- In the This feature links to record control, select the Knowledge class of the record you are identifying with this feature, then enter a record name.
- A popup list of suggestions may appear as you type, if the name exists in the list, then select it.
- Choose the feature shape – Oval, Rectangle, Polygon or Point – to use for the region you will identify on the image.
- Depending on the feature shape you have selected, position and resize the shape by doing one of the following:
- Oval shape: Use the up/down or left/right arrow handles to adjust the height and width of the oval. Position the oval with the centre ‘+’ handle. Alternatively, you can click-and-drag over the region within the image to create a new oval at that position.
- Rectangle shape: Use the corner arrow handles to adjust the height and width of the rectangle. Position the rectangle with the centre ‘+’ handle. Alternatively, you can click-and-drag over the region within the image to create a new rectangle at the position.
- Polygon shape: Use the point arrow handles to move the point in any direction. Add new points by dragging the small circles on the edges of the polygon. Position the polygon using the centre ‘+’ handle. Alternatively, you can click-and-drag around the region within the image to create a polygon that follows the path drawn in the click-and-drag movement.
- Point shape: Position the point using the centre ‘+’ handle. Alternatively, click anywhere on the image to position the point.

- Once you’re happy with the region that has been identified, click Save.
Applying features to Sounds
- Display the record you want to apply a feature to in the View page.
- Select the General tab in the metadata column on the right-hand side of the page.
- In the Features control, click Add.
- In the This feature links to record control, select the Knowledge class of the record you are identifying with this feature, then enter a record name.
A popup list of suggestions may appear as you type, if the name exists in the list, select it. - In the Index to specific time in recording control, do one of the following:
- If the feature is not to be associated with a specific time in the audio’s timeline, then select Don’t index from the controls button menu. The time should say ‘Not set’.
- If you are associating the feature to a specific time within the audio timeline, select Do index from the controls button menu. Using the audio player’s seek control, seek to the time in the audio’s timeline where the feature is mentioned. Click Set time. The time should show the timecode for the feature.
- Click Save.
Editing a feature
- Display the record containing the feature you want to edit in the View page.
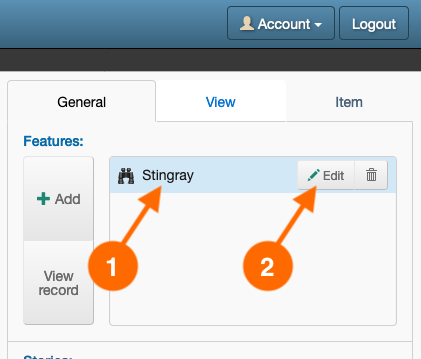
- Select the name of the feature listed in the Features control, then click the Edit button that appears in the row next to the selected feature.
- Apply the changes you want to make to the feature, then click Save.
Removing a feature
- Display the record you want to remove a feature from in the View page.
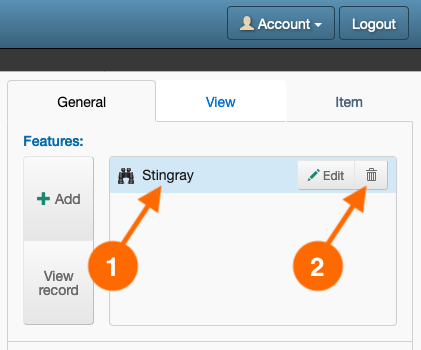
- Select the name of the feature listed in the Features control, then click the trash can (icon) button that appears in the row next to the selected feature.
- In the Remove feature window, click Remove.


